
Among the vast array of movements one can perform with a Kettlebell, a personal favorite of mine is the kettlebell windmill. It is, however, frequently misunderstood and performed incorrectly by many. This is likely due to a lack of understanding about the purpose of the exercise as well as how to load it properly. Special attention to the details and technical nuances of this exercise is key to ensuring it can be implemented safely and effectively.
What Is It?
Kettlebell Windmill
Kettlebell expert and StrongFirst director of education, Brett Jones, classifies the kettlebell windmill as “A loaded stretch and strengthening exercise” which I find to be an excellent description. As previously mentioned, most individuals struggle to wrap their heads around this movement because they aren't exactly sure what its function is or where it belongs in a program.
To elaborate, the primary area where the “stretch” should be felt is in and around the hip area which is the primary driver of the entire movement, if done correctly. An additional stretch can be felt in the hamstrings and chest as well depending on one’s current mobility status. Mobility through the thoracic spine is also critical to ensure one can rotate their upper body through the movement effectively, although no traditional “stretch” will likely be felt in that area.
One could argue that this movement is a full-body strengthening exercise, but the primary emphasis is placed on both the core and shoulder/scapular joint. To perform this movement effectively, the scapula must remain packed while keeping the arm straight so that it divides the middle axis of the body. The core keeps the postural integrity of the back intact while also allowing the hips to remain slightly hinged. Upper body strength also plays a role, as it is what gets the weight overhead in the first place and holds it there throughout the movement.
How To Perform
1.) Much like building a house, this movement starts from the bottom up, specifically the stance. A common mistake I see most people make on this movement is assuming a stance that is too wide which ultimately does not allow for the hips to move properly. The feet should ideally be hip-width apart, and certainly no great than shoulder-width apart. A slight angle should be taken such that feet are about a quarter turn or angled outward at 45 degrees.
2.) Next, the weight is pressed overhead while the core is braced appropriately. This means no flaring of the rib cage or sucking the belly in, but instead breathing diaphragmatically and bracing appropriately.
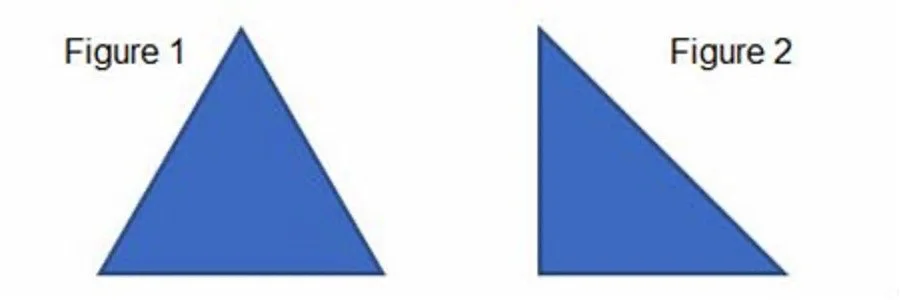
3.) You are now ready for what Brett calls the “shift and lift”, a term he coined that I find rather useful in coaching this movement. The hip that is under the weight shifts back and up at approximately a 45-degree angle, which aids in that leg getting vertical. The weight distribution should be about 70% on the back leg and 30% on the front leg while the rear heel stays completely flat. A slight or soft knee bend is advised on the front leg as well so that the hip is more freely able to move, and no strain is placed on that leg itself. An excellent representation of the “shift and lift” is pictured in Figures 1 and 2 below. Figure 1 represents the beginning of the movement noted by a symmetrical stance, and Figure 2 represents the shifting of the hips where the rear leg is now vertical and the front leg is at a greater angle.
Visual adapted from Brett Jones, StrongFirst.com
While the hip shift and lift occur, the upper body must extend in a straight line of the hip, ultimately falling into the same 45-degree angle as it parallels the hip. Thoracic mobility is key here because the upper body will rotate as the shift occurs so that the arm holding the weight is vertical. There must be no lateral flexion of the spine here so that stress is not placed on the lumbar spine in any fashion.
4.) Lastly, as the hip shift and lift continue, the free arm should reach towards the inside heel of the front leg, touching the ground if your mobility and execution of the movement are up to par. Touching the ground does not have to be the primary emphasis of the movement but maintaining control throughout the movement at an increased range of motion will likely provide greater benefits. Ensure that you maintain the proper weight distribution throughout the entire movement, (70-30), and do not allow any flexion of the spine in any direction.
Where does it belong in a program?
Once you understand the proper execution of this movement, it can still be slightly confusing to determine where exactly it belongs in a comprehensive training program. If thought of like a restaurant menu, this movement will never be a "main dish", but rather an appetizer or side which enhances the rest of the meal.
It serves as a fantastic “primer” to heavier compound movements such as the squat, deadlift, or overhead press that place a significant demand on the hips and shoulders respectively. It is also a fantastic accessory movement that can be placed in between other demanding exercises to provide active recovery or maintain limber mobility. It must certainly be respected, and requires one full attention to detail, but can truly be implemented wherever one desires it to be in their program or even as a stand-alone movement on days when a lot of sitting occurs.
I would certainly advise starting with little to no weight as you begin experimenting with this movement and learning the proper technique to ensure you do not injure yourself. Once you've confidently grooved the pattern in an unloaded manner, start adding load slowly and ensure that range of motion/movement execution never comes at the cost of movement quality.
Conclusion
Perhaps one of the most misunderstood movements out there today, the kettlebell windmill, is a phenomenal addition to any training program when executed correctly. It challenges hip, shoulder, and thoracic mobility as well as scapular stability in a way that is unmatched by many other movements. It is extremely versatile and be done by novice to advanced trainees alike. Give it a shot and toss it into your next training program to test it out for yourself. Thanks for reading.